LDT-I200 Converter Lining Laser Thickness Gauge
-
Supplier: Wuhan CenterRise M&C Engineering CO., Ltd. -
Region: Hubei, China -
Contact: Ms Floria Liang -
Price: -
Min. Order: 1 piece
LDT-I200 Converter Lining Laser Thickness Gauge
Overview
LDT-I200 is a new generation of converter lining thickness gauge launched by our company. The system equipment emits a pulsed laser beam to the lining surface of the converter, and receives the returned laser light to measure its flight time. Then the system equipment calculates the distance between the equipment and the target point according to the transmission speed of the laser. During measurement, the user pushes the equipment to a certain position on the platform in front of the converter, and the equipment can start to scan and measure the target area of the converter after the equipment performs rapid self-positioning.
The detection principle
The measurement speed of LDT-I200 can reach up to 2,000,000 points per second, and each scan can obtain distance data of more than 1.5 million points. The actual surface curve of the entire converter lining can be obtained by combining the measurement data of different positions and angles.
During the measurement, the laser head of the equipment rotates at a certain step angle to rapidly change the angle of the pulsed laser beam. Within 4 minutes, the three-dimensional surface contour of the converter lining can be formed, and the thickness information of the furnace lining can be obtained through coordinate conversion calculation. The measurement accuracy up to ±2mm.
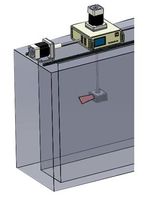
In order to convert the distance from the internal point of the converter to the thickness gauge into the thickness of the furnace lining at each point, we must know the coordinate relationship between the trolley and the converter. We use the second laser head to position the trolley. When the trolley is pushed to the measurement site, the positioning laser head rotates at high speed to scan the three reflective strips opposite the converter. Through triangulation measurement and calculation, we can calculate the relative position of the trolley to the reflective strips. The coordinates of the reflective strip and the converter are known through mapping, so that the coordinates of the trolley relative to the converter can be accurately obtained.
The main components
1. Laser measuring head
2. Wireless communication
3. Battery pack
4. Mobile laser thickness gauge host
5. Converter inclination measurement system
6. Cooling circulation system
7. Positioning auxiliary reflector
8. Laser positioning system
The technical indexes
Laser reproducibility: ±2mm
Laser accuracy: ±2mm
Local fastest measurement time: <15s
Positioning time: <30s
Full image measurement time: <4min
The highest measurable lining temperature: 1850℃
Measuring distance: 0.5-25m
Actual points are measured per frame: >1500000 points
Continuous working time after fully charged: ≥3h
Eye-safe laser: Class 1 laser product (doesn't hurt the eyes)
The parameters of laser measuring head
Measurement principle: According to the flight time and speed of the laser to calculate the distance
Laser reproducibility: ±2mm
Laser accuracy: ±2mm
Scan rate: 2000000 points/second
Measuring angle: vertical ±40°, horizontal 360°
Maximum measurement temperature: 2200℃
Working temperature: -20℃-80℃
Cooling method: Integrated liquid cooling system, IP64 grade protection
Laser wavelength: 1550nm (near infrared)
Wuhan CenterRise M&C Engineering CO., Ltd.
more info, please contact zero zero eight six one three nine nine five five eight eight five nine seven or sales@whzfy.com
-
GGD Box Distribution Box Electric Cabinet Box Production Line

-
Cheap 1-6 inch wire nailing equipment Z94 series concrete nailing machine

-
8508 Wire diameter 0.15- 0.8mm coil spring 2-axis machine, mini coil spring machine, small spring machine

-
Factory Price High Frequency Induction Brazing Machine

-
Spare parts for powder coating machine FX1270 black and white insert sleeve made by PTEF

-
ACL Parts Pittsburgh Lock Machine Parts Rolling

-
Portable Gold Melting Furnace 220v Precious Metal Melting Furnace for Melting Small Gold

-
Shoveler

-
WGS-L020 Flat Steel/Ribbon Iron Width Measuring System

-
LDC-X200 Laser Diameter Measuring System

Other Products
-
 $100000.00 / piece
 -
 $100000.00 / piece
 -
 $100000.00 / piece
 -
 $100000.00 / piece
 -

-

-

-

-

-


