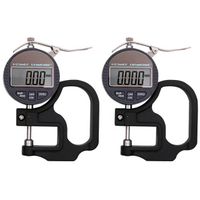
EC-900 Wide Range Paint Thickness Gauge Coating Thickness Gauge with Separate Probe
-
Supplier: Shenzhen Yowexa Sensor System Co., Ltd. -
Region: Guangdong, China -
Contact: Mr Jimmy Wong -
Price: $136.50 / 1 - 99 pieces
$105.00 / >=100 pieces -
Min. Order: 1 piece
| place of origin; place of origin: | Guangdong, China | accuracy: | ±(2%+1μm) |
| brand: | YOWEXA | standard: | CE, ROHS, ISO 2178, 2360, GB/T 4956-2003, 4957-2003 |
| range of working temperature: | -10~50℃ | Sales unit: | single product |
| model: | EC-900 | Customization support: | OEM production |
| Reading memory: | 2000 readings | Resolution: | 0.1μm(0~99.9μm), 1μm(≥100μm) |
| Measuring range: | determined by the probe | Warranty: | 1 year |
| Gross weight per piece: | 1.272 kg | type: | Thickness gauge |
| USB data transfer: | support | Single package size: | 31.5X28X9 cm |
EC-900Paint Thickness Gauge with Wide Measuring Range Coating Thickness Gauge with Separate Probe

describe:
EC-900 Thickness Gauge can non-destructively measure the thickness of the non-conductive coating on the metal surface, and the thickness of the non-ferromagnetic metal coating on the ferromagnetic metal (such as iron, nickel, cobalt, etc.). Specific uses include measuring the thickness of painted or galvanized layers on iron and stainless steel, measuring the thickness of painted or plastic films on aluminum and copper, etc.
The EC-900 can be equipped with a variety of user-friendly detachable probes.
|
feature: • Independent digital probe |
application: |
| host type | EC-900 |
| unit of measurement | microns, millimeters, mils |
| User Calibration Method | Zero calibration, point calibration |
| Statistical data | Number of data, maximum value, minimum value, mean value, standard deviation |
| USB data transfer | support |
| storage | 2000 measurements |
| exhibit | dot matrix display |
| operating environment | Temperature: -10~+50℃; Humidity: 20~90% RH (non-condensing) |
| storage environment | Temperature: -20~+60℃; Humidity: 20~90% RH (non-condensing) |
| power supply | 3 AAA 1.5V alkaline batteries |
| 3 AAA 1.2V rechargeable batteries | |
| degree of protection | IP40 |
| aspect | 174*73*40mm |
| shell material | ABS |
| weight | About 200g (without battery) |
| standard | CE, ROHS, ISO 2178, 2360, GB/T 4956-2003, 4957-2003, JJG-818-2005 |
| Probe type | FN2.0 | FN3.0 | F5.0N3.0 (recommended) |
| Measuring principle | Fe: electromagnetic induction; NFe: eddy current effect | ||
| resolution | 0.1μm (0~99.9μm); 1μm (≥100μm) | ||
| Measuring range | 0~2000μm | 0~3000μm | Iron: 0~5000μm |
| NFe: 0~3000μm | |||
| accurate | ±(2%+1μm) | ||
| Probe trigger force | 0.3~0.8N | ||
| Maximum measurement speed | 2 readings/sec | ||
| The minimum radius of curvature of the substrate | Convex 5mm; Concave 25mm | ||
| Minimum measuring area | 10mm in diameter | ||
| Minimum substrate thickness | Iron: 0.20mm; NFe: 0.03mm | ||
| operating environment | Temperature: -10~+50℃; Humidity: 20~90% RH (non-condensing) | ||
| storage environment | Temperature: -20~+60℃; Humidity: 20~90% RH (non-condensing) | ||
| degree of protection | IP40 | ||
| aspect | Wire: Φ3.5*1000mm; Probe: Φ17*67mm | ||
| shell material | Stainless steel | ||
| weight | about 60g | ||


-
0.001mm Micrometer Digital Dial Thickness Gauge for Plastic Film Leather Paper Inch Measurement Tool Thickness Gauge

-
The new LS220 coating thickness gauge can test non-magnetic and non-conductive coatings, with built-in integrated ruby tip probe Fe/NFe

-
Stainless Steel Wet Film Thickness Gauge 25~3000um Hexagon Paint Brush Wet Film Thickness Gauge

-
2023 NEW BENETECH GT235 Car Paint Coating Thickness Gauge

-
Gm100 Digital LCD Ultrasonic Thickness Gauge Thickness Gauge Test Metal Width Gauge

-
ANGRY LR-FK202 High Precision Concrete Crack Width Measuring Instrument

-
Ultrasonic Metal Plastic Ceramic Glass Thickness Gauge MT160 4.5 Digit LCD EL Backlight Thickness Gauge

-
LS220B Linshang Bluetooth car detector car paint thickness gauge coating thickness gauge

-
CM-8825FN Coating Thickness Gauge F/NF Paint Thickness Gauge Range 0~1250

-
0-25mm digital display horizontal thickness gauge 0.01mm jewelry pearl ruler round diameter metal thickness gauge micrometer


